
How to Make Handmade Soap: A Beginner’s Guide to DIY Soap Crafting
Discover how to make your own handmade soap with this beginner’s guide. From materials to safety tips, learn everything you need to craft natural, custom soap bars.
SOAP MAKING
As an Amazon Associate, I earn from qualifying purchases. This means I may earn a commission if you click on an affiliate link and make a purchase, at no extra cost to you.


Voulosimi Silicone Soap Mold - Soap Making Cutting Mold Soap Cutter with Wavy Cutter & Straight Slicer and 100 Pcs 6 x 6 inch Shrink Wrap Bags
The Natural Soap Making Book for Beginners: Do-It-Yourself Soaps Using All-Natural Herbs, Spices, and Essential Oils
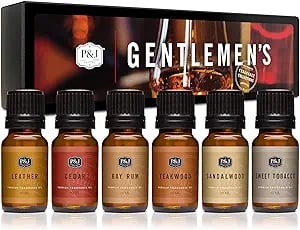

P&J Trading Fragrance Oil Gentlemen's Set | Leather, Sweet Tobacco, Teakwood, Bay Rum, Cedar, Sandalwood Candle Scents for Candle Making, Freshie Scents, Soap Making Supplies, Diffuser Oil Scents
1. What You Need to Get Started in Soap Making 🧼
To begin making your own soap, gather the following supplies:
Lye (Sodium Hydroxide): Lye is essential for soap making, as it chemically transforms fats and oils into soap. Handle it with caution and full protection.
Oils and Fats: The base of your soap. Common oils include olive, coconut, and palm oil, each bringing unique qualities to the final product.
Water or Liquid: Distilled water is most common, but you can also use other liquids like milk or tea for added properties.
Fragrance and Essential Oils: Choose natural essential oils or fragrance oils that are labeled as skin-safe. Some fragrance oils may cause irritation, so verify before use.
Colorants: Natural colorants such as clays, herbs, and micas can be used for a beautiful, natural-looking soap.
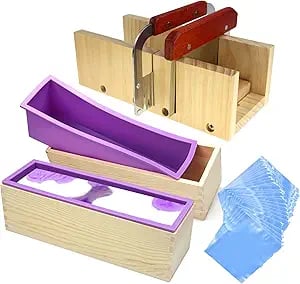
Soap Mold: Silicone molds work well, as they make it easy to remove the soap once hardened.
2. Safety First: Handling Lye and Soap Making Precautions ⚠️
Lye, or sodium hydroxide, is a highly caustic substance that can cause chemical burns if it comes in contact with skin. Here’s how to handle it safely:
Wear Protective Gear: Always wear gloves, eye protection, and long sleeves to protect against splashes or spills.
Work in a Ventilated Area: Lye releases fumes when mixed with liquid, so work in a space with good airflow or near a window.
Add Lye to Water, Never Water to Lye: Always pour lye into water, not the other way around, to avoid a dangerous reaction.
Use Dedicated Equipment: Use separate equipment for soap making that’s not used for cooking, as lye residue can be harmful.
3. Step-by-Step Guide to Basic Cold Process Soap Making 🌿
Cold process soap making is one of the most popular methods, as it allows you to work with various oils and scents without cooking. Here’s a step-by-step guide:
Prepare Your Work Area: Lay out all your materials and put on your protective gear.
Measure Ingredients: Carefully measure lye, oils, and liquid according to your recipe. Weighing ingredients accurately is essential.
Mix the Lye Solution: Slowly add lye to water (never the reverse) and stir until it dissolves. The mixture will heat up and emit fumes – allow it to cool in a safe, ventilated spot.
Melt Oils and Fats: Heat your oils until they’re liquid. Allow them to cool until they’re roughly the same temperature as the lye solution.
Combine Lye and Oils: Slowly pour the lye solution into the oils and mix with an immersion blender until the mixture thickens to “trace,” or a pudding-like consistency.
Add Fragrance and Color: Add essential oils, fragrance, and colorants to the mixture and stir until fully incorporated. Verify that your fragrance oil is labeled as skin-safe to avoid irritation.
Pour Into Mold: Pour the soap into your mold, smoothing the top with a spatula if needed.
Let It Cure: Cover and insulate the mold to allow the soap to go through the “gel phase” as it hardens. Leave it undisturbed for 24-48 hours before unmolding.
Cut and Cure Further: Once unmolded, cut the soap into bars and let it cure for 4-6 weeks, which helps it harden and improves its quality.
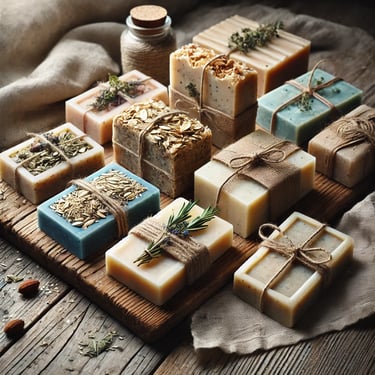
4. Customizing Your Soap with Scents and Colors 🌸
One of the most exciting parts of soap making is customizing it to your preference. Here are some tips:
Essential Oils: Choose scents like lavender, peppermint, or tea tree for natural fragrance. Essential oils also have added skin benefits.
Natural Colorants: Use clays (e.g., rose clay, green clay) for soft colors, or activated charcoal for a rich, dark color. Mica powders are also a safe, natural option.
Add-Ins: Add gentle exfoliants like oatmeal, dried herbs, or flower petals for texture. Be cautious, as some materials may discolor or degrade over time.
5. Storing and Using Your Handmade Soap 🧴
After the curing period, your soap is ready for use. Store unused bars in a cool, dry place, as exposure to moisture can shorten their shelf life. Soap bars wrapped in breathable paper can last longer and retain their scent better. If gifting your soap or selling it, notify users of any allergens, particularly if you’ve used nut-based oils or natural additives.
6. Common Soap Making Mistakes to Avoid 🚫
Avoiding common mistakes ensures that your soap is both beautiful and functional:
Incorrect Measurements: Accurate measurements of lye and oils are essential for soap to form correctly.
Overheating Oils: Oils that are too hot may cause “seizing,” making it difficult to pour the soap into molds.
Skipping the Cure Time: Using soap before it’s fully cured can make it harsh on the skin and reduce its longevity.
Conclusion
Soap making is a fantastic hobby that can bring a sense of self-sufficiency and creativity into your home. With practice, you can create customized, beautiful bars of soap that suit your skin and your style. Always remember, though, that safety comes first. Handle lye with care, wear protective gear, and research all ingredients to ensure they’re skin-safe. And if you’re sharing your soap with others, notify them of any allergens or potential sensitivities.
If you liked this article, you may love these:
Essential Emergency Canning Supplies: What You Need to Know
Knife Sharpening Mistakes to Avoid: A Guide to Proper Sharpening
Self-Improvement Burnout: Why Trying to Be Your Best Is Holding You Back
Helpful Resources for Soap Making
For more detailed information on safe soap-making practices, consult these trusted sources:
Soap Making Resource – https://www.soap-making-resource.com
The Soap Kitchen – https://www.thesoapkitchen.co.uk
Bramble Berry Soap Making Supplies – https://www.brambleberry.com
Teach Soap – https://www.teachsoap.com