
Essential Knife Sharpening Tips for Every Cook
Discover the importance of a sharp knife in your kitchen or workshop. This comprehensive guide covers essential knife sharpening techniques, tools, and maintenance tips to ensure your blades remain safe, efficient, and precise for all your cooking needs.
BLADESMISC
As an Amazon Associate, I earn from qualifying purchases. This means I may earn a commission if you click on an affiliate link and make a purchase, at no extra cost to you.

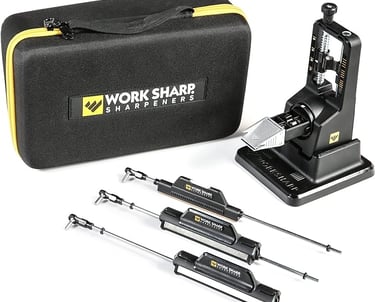
Work Sharp Precision Adjust Elite Knife Sharpener - Adjustable Knife Sharpening System - For Hunting, Serrated & Kitchen Knives
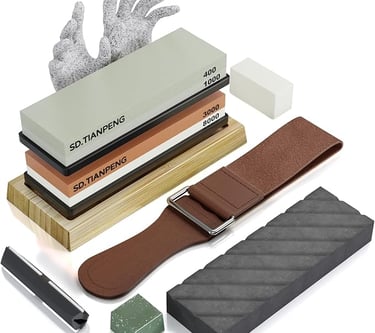
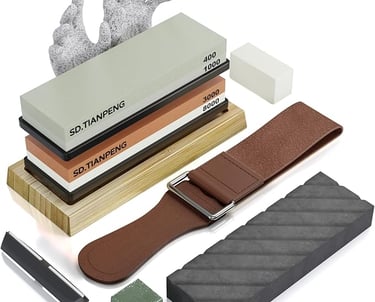
Knife Sharpening Stone - Dual Grit Whetstone 400/1000 3000/8000, Knife Sharpening Stone Set, Tpstone Knife Sharpener Tool,Easy to Use
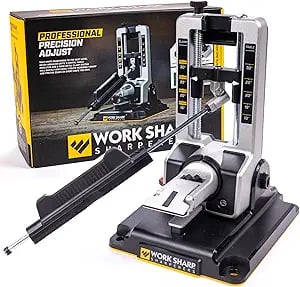

Work Sharp Professional Precision Adjust Knife Sharpener Tool, complete angle adjustable knife sharpening system
Understanding Knife Sharpness
Why Knife Sharpness Matters
A sharp knife cuts through food effortlessly, reducing the risk of slips and accidents. Dull knives require more force, making them harder to control and more likely to cause injuries. A well-sharpened knife not only enhances your cutting efficiency but also preserves the integrity of your ingredients, allowing for cleaner cuts and better presentation.
Signs That Your Knife Needs Sharpening
Recognizing when your knife needs sharpening is crucial. Here are some signs to look for:
Difficulty Cutting: If you find yourself applying excessive force while cutting, it's time to sharpen your knife.
Frayed Edges: Look for any visible damage or unevenness along the blade's edge.
Dull Sound: A sharp knife produces a clean sound when slicing through food, while a dull knife may produce a dragging or tearing noise.
Types of Knife Sharpening Tools
Choosing the right sharpening tool is essential for effective results. Here are some popular options:
1. Whetstones
Whetstones are a traditional and widely used sharpening method. They come in various grits, with lower grits (around 200-600) used for repairing edges and higher grits (1000-6000) for polishing.
Pros:
Provides precise control over sharpening angles.
Can sharpen a variety of knives, including high-quality and specialty blades.
Cons:
Requires some practice to master the technique.
Can be time-consuming compared to other methods.
2. Honing Rods
Honing rods, often made of ceramic or steel, are used to realign the edge of the knife rather than sharpen it. They are ideal for maintaining the sharpness of a knife between full sharpenings.
Pros:
Quick and easy to use.
Helps maintain the knife’s edge over time.
Cons:
Does not actually sharpen a dull knife.
Requires regular use to be effective.
3. Electric Sharpeners
Electric sharpeners automate the sharpening process, making it easy and fast. They typically feature slots with pre-set angles for sharpening.
Pros:
User-friendly and fast.
Consistent results with minimal effort.
Cons:
Can remove too much material if not used properly.
Limited to certain types of knives, often not suitable for high-quality or specialty blades.
4. Pull-Through Sharpeners
These are simple, portable tools that feature two slots for sharpening. You pull the knife through the designated slots to sharpen the blade.
Pros:
Convenient and easy to use.
Affordable and compact.
Cons:
May not provide the same level of sharpness as whetstones.
Can wear down the blade unevenly if not used correctly.
Step-by-Step Guide to Sharpening with a Whetstone
Using a whetstone can be intimidating at first, but with practice, you’ll achieve excellent results. Here’s a detailed guide:
Materials Needed
Whetstone (dual-sided is ideal for varying grits)
Water or oil (depending on the whetstone type)
Towel
Knife (of your choice)
Preparation
Soak the Whetstone: If using a water stone, soak it in water for 10-15 minutes until it’s saturated. For oil stones, apply a thin layer of oil on the surface.
Stabilize the Whetstone: Place the whetstone on a non-slip surface or a damp towel to keep it stable during sharpening.
Sharpening Technique
Determine the Angle: Most knives are sharpened at an angle between 15 to 20 degrees. You can use a protractor or a sharpening guide for accuracy.
Start with the Coarse Side: Hold the knife with one hand and the whetstone with the other. Position the knife at the desired angle and place the heel of the blade against the whetstone.
Sharpening Motion: Using light pressure, slide the knife across the whetstone in a sweeping motion, from heel to tip. Use consistent, smooth strokes, and maintain the angle throughout. Repeat this process 10-15 times on one side.
Check the Edge: After sharpening one side, check the edge for any burrs (tiny metal shavings). Flip the knife over and repeat the process on the other side.
Finishing Touches: Once both sides are sharpened, switch to the finer side of the whetstone. Repeat the sharpening process to polish the edge, using the same number of strokes on each side.
Rinse and Wipe: Clean the blade with water and dry it with a towel. Make sure to clean the whetstone as well, removing any metal filings.
Testing the Sharpness
To test your knife's sharpness, try slicing through a piece of paper or a tomato. A sharp knife should glide through easily without tearing.
Using a Honing Rod
When to Use a Honing Rod
Honing rods should be used regularly, ideally before and after each use, to maintain the knife's edge.
Technique
Position the Rod: Hold the honing rod vertically, with the tip resting on a stable surface.
Angle the Knife: Hold the knife at a 15-20 degree angle against the honing rod.
Honing Motion: Starting at the heel of the knife, gently pull the blade down along the rod, sliding it from heel to tip. Alternate sides, making 5-10 passes on each side.
Electric Sharpeners
How to Use an Electric Sharpener
Set Up the Sharpener: Place it on a stable surface, ensuring it’s plugged in and ready for use.
Insert the Knife: Place the knife in the designated slot, ensuring it’s aligned properly.
Follow the Instructions: Activate the sharpener and let it do the work. Most sharpeners will have specific timing or guidelines for sharpening various types of blades.
Remove and Test: After the sharpening cycle, remove the knife and test the sharpness using the same methods as before.
Maintenance Tips
Cleaning Your Knives
After sharpening, always clean your knives to remove any metal particles. Use warm soapy water and a soft cloth to wipe down the blade, then dry it thoroughly.
Proper Storage
Store your knives in a manner that protects their edges:
Knife Block: A wooden or bamboo knife block keeps the blades safe and organized.
Magnetic Strip: Mounting knives on a magnetic strip keeps them accessible and prevents dulling from contact with other utensils.
Blade Guards: If you need to store knives in a drawer, consider using blade guards to protect the edges.
Regular Sharpening Schedule
Establish a sharpening schedule based on usage. For professional chefs, this may be once a week, while home cooks might sharpen their knives monthly. Regular honing will also reduce the need for more intensive sharpening.
Conclusion
Sharpening your knife is an essential skill that enhances both safety and performance in the kitchen or workshop. By using the right tools and techniques, you can maintain a sharp edge that makes your cooking tasks easier and more enjoyable. Remember, a sharp knife is a safe knife, so invest the time in proper maintenance and enjoy the benefits of a well-honed blade. Whether you choose to use a whetstone, honing rod, electric sharpener, or a combination of methods, mastering the art of knife sharpening will serve you well for years to come.